Have you ever stumbled upon a beautifully designed invitation or a striking poster with text gracefully flowing vertically? You might have wondered, "How did they do that?" The answer, my friend, often lies in the magic of vertical writing. Whether you're crafting eye-catching titles, designing invitations, or simply adding a touch of artistic flair to your documents, mastering vertical writing can open up a world of creative possibilities.
Now, you might be thinking, "Vertical writing? Sounds complicated!" But fear not, because we're about to embark on a journey to demystify this technique and empower you to wield it like a pro.
Let's start by addressing the elephant in the room – "cara menulis ke bawah di word" – which translates to "how to write downwards in Word" in Indonesian. It's a question that has puzzled many, sending them down the rabbit hole of online forums and tutorials. But worry not, because you've come to the right place. We'll explore all the ins and outs, from the basics to the more advanced techniques, so you can confidently navigate the world of vertical writing in Microsoft Word.
Think of this article as your trusty guide, your virtual companion in the quest for vertical writing mastery. We'll cover everything from understanding the different methods to troubleshooting common issues, ensuring you have all the tools you need to create visually stunning documents.
So grab your favorite beverage, settle in, and let's dive into the fascinating world of vertical writing in Word!
Advantages and Disadvantages of Vertical Writing in Word
Like any design technique, vertical writing comes with its own set of pros and cons. Understanding these can help you make informed decisions about when and how to use it effectively.
| Advantages | Disadvantages |
|---|---|
|
|
Best Practices for Implementing Vertical Writing in Word
Now that we've explored the advantages and disadvantages, let's dive into some best practices to ensure your vertical writing shines:
- Choose the Right Method: Word offers several ways to write vertically. Experiment with text boxes, tables, and WordArt to find the best fit for your project.
- Font Selection is Key: Opt for clear, legible fonts, especially when writing vertically. Avoid overly decorative or script fonts that might hinder readability.
- Spacing Matters: Pay close attention to line spacing and character spacing to ensure your vertical text is neither too cramped nor too spread out.
- Less is More: Vertical writing works best when used strategically. Avoid overusing it, as it can make your document look cluttered.
- Preview Before Printing: Always preview your document before printing to ensure the vertical text appears as intended and there are no formatting issues.
As you embark on your vertical writing adventures in Word, remember that practice makes perfect. Don't hesitate to experiment, explore different techniques, and let your creativity flourish!

cara menulis ke bawah di word - Trees By Bike

5 Cara Membuat Pangkat Di Word Baik Atas Maupun Bawah Termudah - Trees By Bike

Cara Menulis Angka 1 Kecil Di Word Examples - Trees By Bike
Cara Membuat Tulisan Bergaris Bawah Di Microsoft Word - Trees By Bike
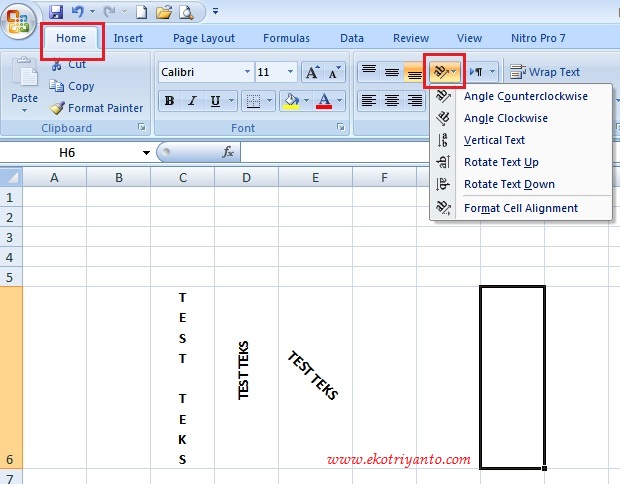
Cara Mengatur Jarak Spasi Kalimat Atas Dengan Bawah di Word - Trees By Bike
![[UPDATE] Cara Membuat Huruf Pangkat Di Android](https://1.bp.blogspot.com/-4gfnDBmrLMk/XldLv9d4KjI/AAAAAAAACsw/MTGAINt-vbMMOZVY-UJHJHws8SgUFemHQCLcBGAsYHQ/s1600/cara-membuat-pangkat-di-word-2016.png)
[UPDATE] Cara Membuat Huruf Pangkat Di Android - Trees By Bike

Cara Menambah Tabel ke Bawah di Microsoft Word 2010 - Trees By Bike

Cara Menghilangkan Garis Bawah Merah di Word, Mudah dan Cepat - Trees By Bike

Cara Menulis Bilangan Pangkat Di Word Examples - Trees By Bike
Cara rata kanan kiri di excel 2021 - Trees By Bike

Cara menulis sumber gambar dari buku - Trees By Bike

Cara Membuat Tulisan Garis Bawah Di Whatsapp Logo Vector - Trees By Bike

Cara Membuat Garis Bawah atau Underline di Word - Trees By Bike

Belajar Menulis Tulisan Berangkai Wordle - Trees By Bike
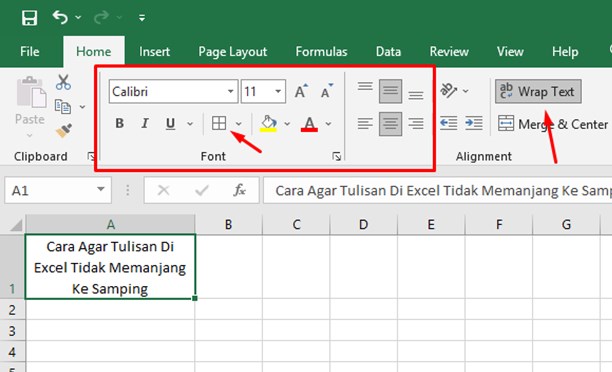
Membuat tulisan excel ke bawah - Trees By Bike